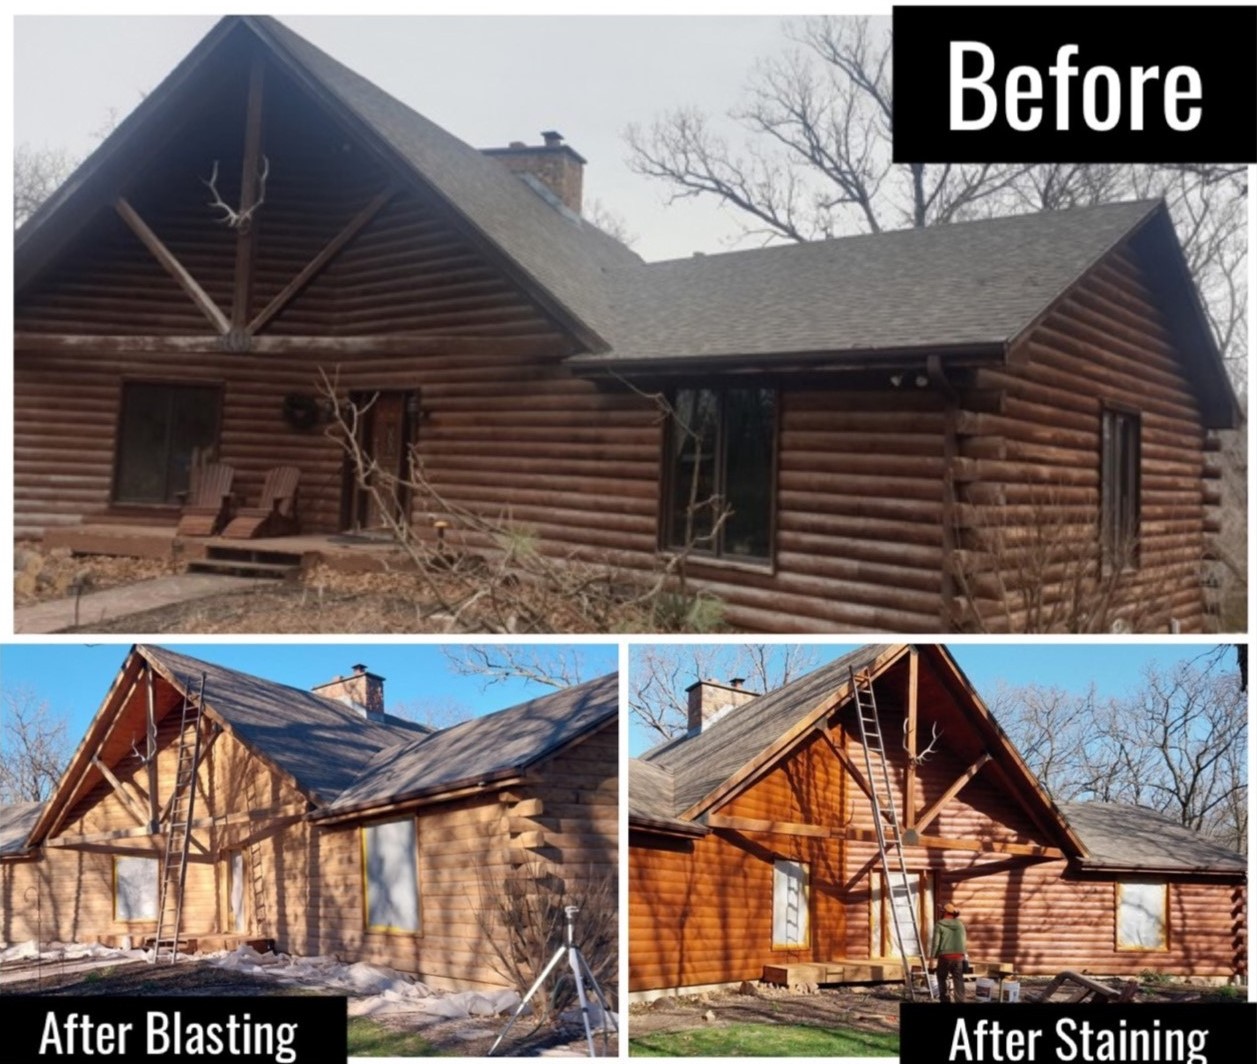
Is your log home in need of a new coat of stain? Staining a log home is essential for preserving the wood, protecting it from the weather, and enhancing its appearance. Here’s a comprehensive guide detailing the restoration process:
1. Preparation
Proper preparation is crucial to ensure the stain adheres well and lasts long.
- Inspect the Logs: Check for cracks, insect damage, mold, or mildew. Address these issues before staining.
- Clean the Logs: Remove dirt, pollen, mildew, or previous stains. You can use a log cleaner, we recommend Sashco Products (or you can just use a mild detergent and water) with a soft brush, pressure washer, or a sprayer. Allow the logs to dry completely (this could take a few days).
- Sanding the Logs (if needed): If the logs are rough or have old stain remnants, sand them to ensure smooth and even staining. Use a medium-grit (80-100) sandpaper.
- Chinking and Sealing Cracks: Repair any gaps or cracks with log chinking, a flexible sealant, to prevent moisture infiltration. See our blog on Chinking and Caulking for more information on this subject.
- Log Replacement (if needed): This can be a major undertaking and may require more experienced hands to tackle. Here are some tips to know if your home has log rot.
- Mask Areas: Cover windows, doors, and non-wood surfaces to protect them from overspray or drips.
2. Choosing the Right Stain
Stains for log homes come in two main types:
- Oil-Based Stains: Penetrate deep into the wood, offering long-lasting protection. They give a rich appearance and resist peeling but may take longer to dry.
- Water-Based Stains: Easier to clean up, faster drying, and more environmentally friendly. However, they don’t penetrate as deeply as oil-based stains and may require more frequent applications.
Additional features to consider when selecting stain:
- UV Protection: Helps protect wood from sun damage.
- Mildew Resistance: Prevents the growth of mold or mildew.
- Color Choice: Choose a color that complements the environment and your style. Darker stains typically provide better UV protection. Our team comes onsite to offer color choices to ensure you get the perfect look for your home. You can also get stain color samples from most log home supply companies.
3. Staining the Log Home
- Test the Stain First: Always test a small area before committing to the entire house. This ensures you’re happy with the color and finish.
- Tools for Application:
- Brush: A natural bristle brush is best for oil-based stains, and synthetic bristles for water-based stains.
- Sprayer: Can be used for quick and even application, but back-brushing is essential to ensure the stain penetrates the wood properly.
- Roller: Less common but can be used for large areas, followed by back-brushing.
- Application Method:
- Work in small sections, typically one log or area at a time.
- Apply the stain evenly, ensuring that you don’t miss any areas.
- Always back-brush after applying the stain to ensure it penetrates into the wood’s surface. This helps avoid streaks and ensures a more even finish.
- Apply multiple coats if necessary, depending on the product instructions. Let each coat dry before applying the next.
4. Drying Time
- Weather Considerations: Apply stain in dry weather, ideally when temperatures are between 50°F and 90°F (10°C to 32°C). Avoid staining in direct sunlight or during high humidity, as this can affect drying and penetration. If you’ve been considering a recoat, now is the perfect weather condition time for most areas in the US.
- Drying Time: Depending on the stain type, drying may take anywhere from 24 to 72 hours for oil-based stains, while water-based stains may dry within 4 to 24 hours.
5. Cleaning and Sealing
After the stain has dried:
- Clean Up: Clean brushes and sprayers with mineral spirits (for oil-based stains) or water and soap (for water-based stains).
- Sealing: Some log homes benefit from applying a clear topcoat or sealer to further protect the wood from moisture and UV damage. Be sure this is compatible with the stain you used.
6. Maintenance
- Regular Inspection: Every year, inspect the log home for any signs of wear, fading, or damage. Address issues immediately to prevent them from worsening.
- Reapplication: Most stains will need reapplication every 3-5 years, depending on the quality of the stain, weather conditions, and exposure. Obviously, proper application will play huge factor in the longevity of the stain as well.
- Touch-ups: For small areas that may wear faster (like the bottom of logs close to the ground), touch up as needed to extend the life of the stain.
Typical Tools and Materials Needed:
- Log cleaner
- Pressure washer or garden hose
- Sandpaper (if sanding is necessary)
- Stain (oil-based or water-based)
- Natural or synthetic brushes (depending on the stain)
- Sprayer (optional)
- Roller (optional)
- Chinking material for sealing gaps
- Drop cloths, painter’s tape, and tarps
By following these steps carefully, you’ll protect your log home from the elements, extend its lifespan, and keep it looking beautiful for years to come.


