Unlike staining or a big remodel job for example, log rot repair can be a winter project. Another words, there is no need to wait until Spring to get started. In fact, it’s better to address the issue sooner rather than later.
Step 1: Identifying Log Rot
Conduct a visual inspection looking for signs of rot, such as discoloration, failing wood or mold. Bring a hammer with you to tap on the logs. You’ll be able to hear a difference between a log that is rotting and one that is not. A log that is rotting will produce a hollow sound compared to a solid log. Also, some logs with interior rot usually bounce the hammer back, whereas a solid log will stop the hammer.
Step 2: Determine the Severity of the Rot
Examine the log rot, if 30% or more of the log has log rot (or less if in an area of significant structural support), it’s better to replace than to repair the damaged area(s). At this point the structural integrity of the home can be compromised and it is important to move ahead, quickly, with a plan to replace the rotted log(s). This can be a difficult task to undertake and one best suited for a log home renovation professional. Make sure to contact a professional with experience, a good reputation, and one that is licensed and insured.
Step 3: Calling a Professional
The first step is to determine if the log can be repaired. If the damage isn’t significant, and it isn’t a structural support log, repair is the easiest and most cost-effective option.
To repair a log, the “soft area” of the log will need to be removed. Once its cleared out, the area will need to be sprayed with Borate to kill any fungus, then a hardener, such as a wood petrifier/consolidator/hardener (liquid wood) can be applied. Finally, wood epoxy is used to rebuild the area, possibly with the addition of backer rods to further strengthen the damaged area.
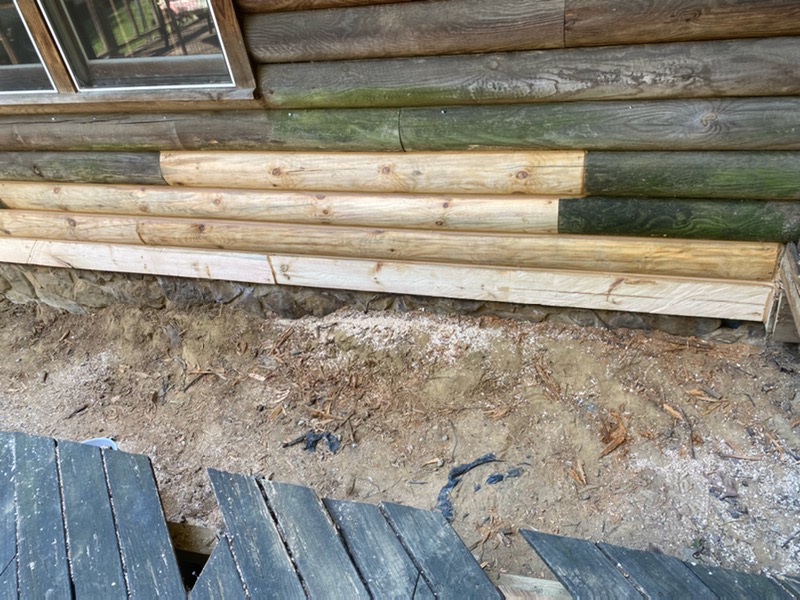
To Replace a log, the first move is to confirm the replacement log is the same type of wood, shape of log, and the right length as the one being replaced. The log will then be carefully cut to fit. Depending on which log needs to be replaced, the wall may have to be jacked up while the replacement is being done. With some good fortune, this step won’t be needed. In both cases the damaged log will need to be cut out with a heavy-duty saber or reciprocating saw. Once the old log is out, it’s time to put the new one in. If you have a tongue and groove style log home, it’s likely the tongue will need to be removed from the new log to make sure it fits easily into the space. Then the new log can be attached, likely with plated deck screws or ring nails. Sealing and finishing the log will be additional steps to both log rot repair and log rot replacement jobs.
Regardless of the extent of the damage, it’s very important to make sure the conditions that promoted the rot in the first place are corrected prior to your rot repair or log replacement.